For a while now, my journey with Blender—learning the ropes of modeling, keyframing, and UV mapping—was a solo mission. It was a personal quest to sharpen my skills, driven by the reality of the IT industry in Indonesia, where we’re often expected to be a “one-man army” handling everything from backend code to visual documentation.
But today marks a turning point. What started as self-improvement just turned into my first real-world challenge from an external client.
The 360° Video Breakthrough
I was approached to handle 360-degree video editing. After some heavy research into the Insta360 ecosystem and testing the waters with Kdenlive and Premiere Pro, I made a deliberate choice to stick with Blender.
While others might see Blender as “just” a 3D modeling tool, for me, it’s a creative powerhouse for 360 content. Here’s why I chose it for this professional gig:
- Spatial Freedom: It allows me to manipulate the camera within a literal 3D environment, offering a level of precision that standard video editors struggle to match.
- Limitless Creativity: I can push the boundaries of “weird” and abstract angles, making the final output stand out from standard panoramic shots.
- Professional Growth: Moving from “learning for myself” to “delivering for a client” changes the stakes. It’s no longer just about clicking buttons; it’s about workflow efficiency and high-end results.
The Technical Secret: Turning Blender into a 360° Studio
Why use a video editor when you can use a 3D engine? Here’s the “God Mode” setup I used to handle this 360-degree challenge in Blender using Eevee:
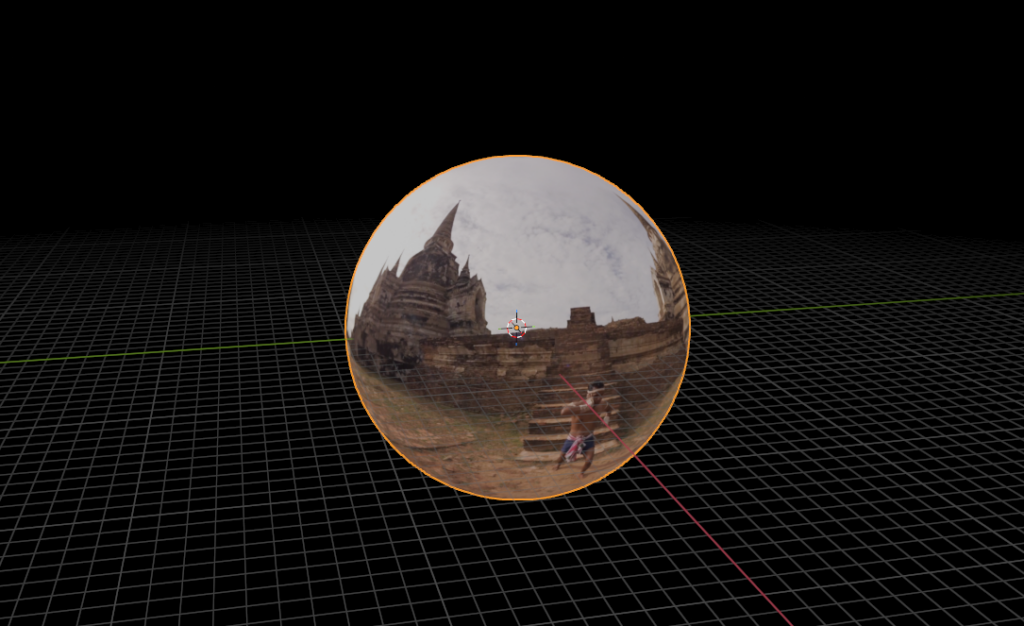
1. The World Inside a Sphere
The core idea is to place the viewer (the camera) inside a giant ball that displays the video.
- The Mesh: Add a UV Sphere. Scale it up big enough so your camera has room to breathe.
- The Flip: In Edit Mode, select all faces and Flip Normals. This ensures the “texture” faces inward toward the camera, not outward.
2. The Shader Magic (The “Emission” Trick)
To get the cleanest image without worrying about shadows or external lamps, I used a self-illuminating material:
- Texture: Plug the 360° Video file into an Image Texture node.
- The Shader: Connect the Color output directly to an Emission node (or the Emission slot of the Principled BSDF).
- Why Emission? This makes the video “glow” with its own light. It ignores the world’s lighting, ensuring the colors are 100% accurate to the original footage.
3. The Camera Mastery
Now, the fun part. Since we are in a 3D space:
- FOV Control: Set the camera’s Focal Length to something that feels natural (around 15mm-25mm works great for that wide, immersive 360 look).
- Keyframing: Instead of fighting with sliders, I just Rotate ($R$) the camera.
- Parenting: I often parent the camera to an Empty at the center. Rotating the Empty gives me a perfectly smooth “orbital” pan without any gimbal lock issues.
4. Adding the “Pro” Touch
Because it’s a 3D viewport, I can drop in 3D Logos, Floating Text, or even Particle Effects that live inside the video. They will have perfect perspective because they exist in the same $X, Y, Z$ space as the camera.
The “Generalist” Advantage
This project confirmed my belief: The best developers are those who can bridge the gap between code and art. By integrating 3D mastery into my web development toolkit, I’m not just building websites; I’m building immersive digital experiences.
The render times might be a bit longer, but the output? Unmatched.